
Insulation Options Compared: Batts, Spray Foam and Rigid Boards
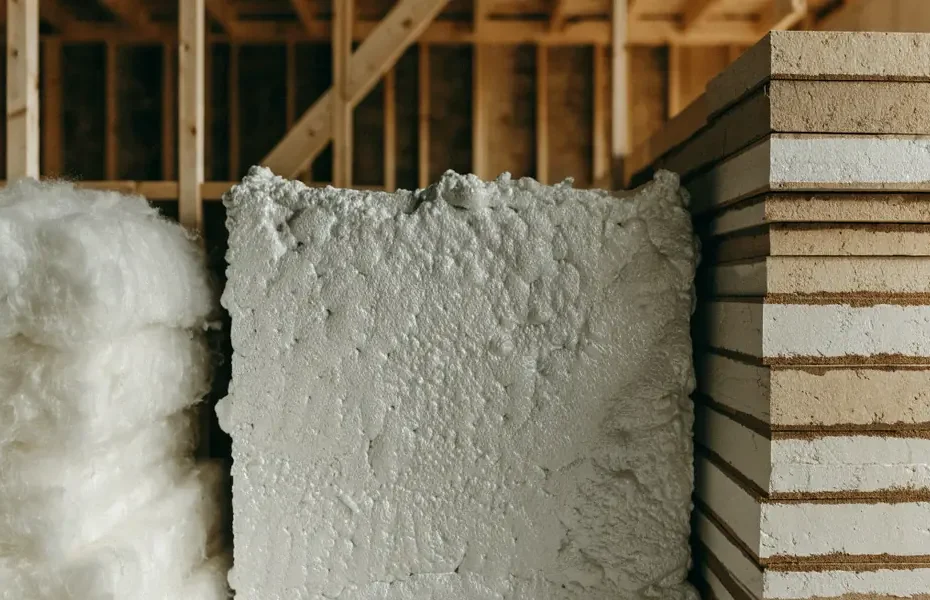
You’re standing in the insulation aisle of a big-box store in Sudbury or Abbotsford, staring at three products that all promise to keep your house warm. Fiberglass batts on one shelf, spray foam kits on another, rigid boards stacked near the contractor desk. The labels throw around R-values, vapour ratings, and coverage charts, and none of them mention the one thing you actually care about: which one won’t leave your home cold in February—or your wallet empty in October. We’ve been in that aisle more times than we can count, and here’s what we’ve learned about choosing between batts, spray foam, and rigid boards for a Canadian self-build.
Why Insulation Matters More in Canada
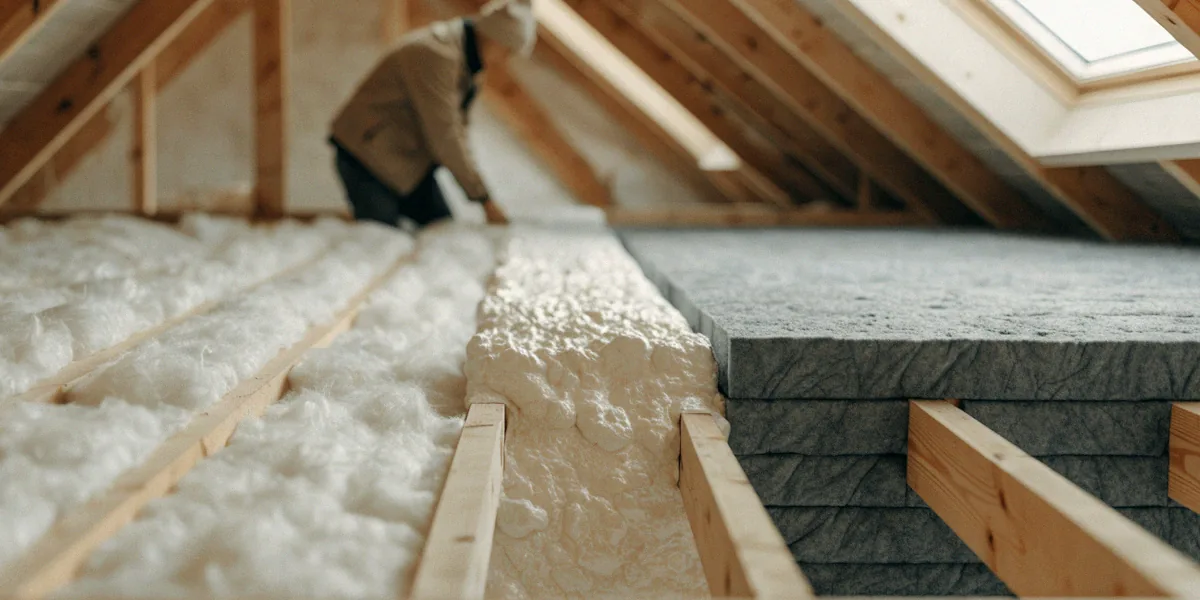
Insulation isn’t a nice-to-have north of the 49th parallel—it’s the difference between a comfortable home and a furnace that runs nonstop from November to April. Canada spans several climate zones, from the mild coastal regions of BC to the deep freeze of northern Alberta and the territories, and your insulation strategy has to match where you’re building.
How Canadian Winters Test Your Walls
Our winters don’t just get cold—they stay cold for months, and they bring wind, freeze-thaw cycles, and moisture that finds every gap in your envelope. A wall that performs fine in a Virginia winter can fail badly in Winnipeg, where the temperature can drop to -40°C with wind chill and stay below freezing for weeks. That’s why air sealing matters as much as R-value: even the best batt loses most of its effectiveness if cold air is moving through it.
R-Values and Your Climate Zone
Natural Resources Canada (NRCan) publishes R-value recommendations by climate zone, and for attics in northern Canada those recommendations climb as high as R-60. That’s not marketing—it’s physics. The colder your zone, the more insulation you need to keep heat inside. Provincial codes back this up: Ontario’s SB-12 sets minimum insulation requirements for new homes, and BC’s Step Code pushes builders toward progressively higher performance tiers. If you’re pulling a building permit, your local authority will check that your planned R-values meet the applicable code before you frame a single wall.
Batts: The Traditional Choice
Batts are the insulation most of us grew up with—fiberglass rolls and mineral wool slabs that fit between studs, joists, and rafters. They’re cheap, widely available, and genuinely DIY-friendly. Owens Corning fiberglass batts are the familiar pink stuff, while Roxul (now branded Rockwool) mineral wool has become a favourite for Canadian self-builds because it’s fire-resistant, water-repellent, and holds its shape even when compressed slightly.
R-values for batts typically run from R-12 in a 2×4 wall cavity up to R-38 or higher in a deep attic. That range covers most residential applications, but batts only perform at their rated value when they’re installed perfectly—no gaps, no compression, no air blowing through them.
Fiberglass vs. Mineral Wool: What We Recommend
We lean toward mineral wool for most Canadian builds, and here’s why:
- Fire resistance: mineral wool doesn’t burn, which matters in a timber frame house where exposed wood is part of the design.
- Moisture tolerance: it drains and dries rather than trapping water like fiberglass can.
- Sound dampening: noticeably quieter rooms, especially in interior walls.
- Fiberglass still wins on price, and it’s fine for interior partitions or budget-conscious attic runs.
Installation Tips for a Tight Envelope
The most common batt mistake we see is gaps around wiring, electrical boxes, and plumbing penetrations. A one-inch gap around a single outlet can cut the effective R-value of that wall section by a third. Split the batt around wires rather than compressing it, tuck mineral wool scraps into awkward corners, and always pair batts with a proper air barrier and vapour retarder. Batts alone don’t stop air movement—they just slow heat conduction.
Spray Foam: High Performance, High Cost
Spray foam is the overachiever of the insulation world. It expands on contact, fills every crack and crevice, and delivers both insulation and air sealing in one step. Brands like Demilec and BASF dominate the Canadian market, and for good reason—their products are tested for our climate extremes.
Closed-cell spray foam offers R-6 to R-7 per inch and acts as a vapour barrier, which means it can handle both insulation and moisture control in a single application. Open-cell foam runs closer to R-3.5 per inch and is more vapour-permeable, so it needs a separate vapour barrier in most Canadian assemblies.
Closed-Cell vs. Open-Cell: Which One Where?
Closed-cell is our default for basements, rim joists, and anywhere below grade where moisture is a concern. It’s denser, stronger, and adds structural rigidity. Open-cell works well for interior walls and attic spaces where you want a softer, more affordable foam and can manage vapour separately. In a timber frame house, closed-cell around the frame’s base and penetrations is often the smartest move for long-term durability.
DIY Spray Foam Kits: Are They Worth It?
Two-component DIY kits exist, and we’ve used them for small jobs like rim joists and window gaps. For anything larger than a few hundred square feet, though, the math stops working. Kits are expensive per board foot, tricky to apply evenly, and the chemicals require serious PPE. Most Canadian building authorities also require certified installers for spray foam in permitted work, which brings us to the next section.
Rigid Boards: The Continuous Insulation Solution
Rigid foam boards—EPS, XPS, and polyiso—come in sheets that go outside your framing, inside your basement walls, or under your slab. Brands like Styrofoam and Kingspan are common on Canadian job sites. Their superpower is breaking thermal bridging: the heat loss that happens when studs conduct cold straight through your wall.
Rigid boards typically deliver R-4 to R-6.5 per inch depending on type. Polyiso has the highest R-value per inch but loses some performance in cold weather; XPS holds up better in the cold but uses a blowing agent with higher global warming potential; EPS is the cheapest and most vapour-permeable.
Exterior vs. Interior Rigid Board Applications
Exterior rigid board goes over your sheathing before siding, creating a continuous thermal break around the whole house. Interior rigid board is common in basements, where it goes against the concrete wall before framing. Both approaches work—the key is picking the right thickness for your climate zone and code requirements.
Managing Moisture and Vapour Barriers
This is where rigid board gets complicated. Adding exterior foam can trap moisture in your wall if your interior vapour barrier isn’t matched correctly. In cold Canadian climates, the rule of thumb is to keep the exterior foam thick enough to keep the dew point outside your sheathing. If you’re unsure, get a building science consultation—moisture mistakes are expensive to fix.
Cost, Code, and Your DIY Comfort Level
Insulation costs vary widely by region and product, but the general ranking is consistent: batts are cheapest, rigid boards sit in the middle, and spray foam is the most expensive per square foot. The Canada Greener Homes Grant offers up to $5,000 for insulation upgrades, which can meaningfully offset the cost of a higher-performance assembly—worth checking before you buy.
Building permits matter here too. Your local authority will require specific R-values in your plans, and spray foam installations often need documentation from a certified installer. Skipping that step can stall your inspection.
Budget Breakdown: What We’ve Paid
On our own builds, we’ve seen roughly these ranges (materials only, before labour):
- Fiberglass batts: $0.40–$0.70 per square foot for R-20 walls
- Mineral wool batts: $0.80–$1.20 per square foot for the same R-value
- Closed-cell spray foam: $2.50–$4.00 per square foot installed
- Rigid EPS board: $0.60–$1.00 per square foot for 2-inch thickness
When to Call a Pro (and When Not To)
Call a pro for spray foam, full-home air sealing, and any insulation work that requires a permit sign-off. Do it yourself for batts in accessible walls and attics, rigid board on basement walls, and small spray foam touch-ups with a kit. If you’re building a timber frame house, we strongly recommend a professional assessment of the whole envelope before you insulate—the frame’s thermal performance depends on getting every layer right.
Our Verdict: Matching Insulation to Your Build
There’s no universal winner. Batts are the budget DIY choice. Spray foam is the airtight retrofit champion. Rigid boards are the new-construction workhorse that stops thermal bridging cold. Most high-performance Canadian homes use a combination—rigid board outside, batts or spray foam inside, and careful air sealing everywhere.
Best for Basements, Walls, and Attics
- Basements: closed-cell spray foam or XPS rigid board against the concrete
- Exterior walls: rigid board sheathing plus mineral wool batts in the cavities
- Attics: blown-in or batt insulation to R-50 or higher, per NRCan guidance
- Timber frame: closed-cell spray foam at penetrations, mineral wool in bays
Final Tips for Canadian Self-Builders
Check your provincial code before finalizing your insulation plan. Ontario’s SB-12 and BC’s Step Code are the two most common frameworks, but every province has its own rules. Buy from Canadian suppliers where you can—shipping foam boards across the border is expensive and slow. And always build a continuous envelope: one gap undoes the work of a whole wall.
No single insulation wins everywhere. Your climate zone, budget, and DIY comfort level should drive the decision—not the loudest label on the shelf. Check your local codes before you buy, and if you’re unsure, ask a building science professional. It’s cheaper than redoing a wall in five years.
FAQ
What R-value do I need for a Canadian home?
It depends on your climate zone. NRCan recommends up to R-60 for attics in northern Canada, with lower targets for southern regions. Walls typically need R-20 to R-30, and basements R-15 to R-25 depending on the assembly and provincial code.
Can I install spray foam myself in Canada?
Small DIY kits are legal for minor applications, but most building departments require a certified installer for permitted work. Closed-cell foam also requires specialized equipment and PPE that isn’t practical for a homeowner.
Is mineral wool worth the extra cost over fiberglass?
For most Canadian self-builds, yes. Mineral wool is fire-resistant, moisture-tolerant, and better at sound dampening. The price premium is usually worth it in exterior walls and timber frame assemblies.
Does the Canada Greener Homes Grant cover insulation?
Yes. The grant offers up to $5,000 for insulation upgrades, including batts, spray foam, and rigid boards, provided the work is done by a qualified installer and meets the program’s requirements.
How do I prevent thermal bridging in my walls?
Add continuous rigid board insulation on the exterior of your sheathing. This breaks the conductive path through studs and can improve your wall’s effective R-value by 20–30% compared to cavity insulation alone.