
Insulation Choices for Cold Climates: What Canadian Owner-Builders Need to Know
The first winter after we framed up our self-build north of Peterborough, Ontario, we learned a lesson the hard way. A cold snap hit minus 32°C with wind, and the thermostat in our temporary living space never caught up. That was the moment we stopped treating insulation as a line item to trim and started treating it as the backbone of the whole house. If you’re an owner-builder in Canada, the insulation decisions you make now will determine whether your home is comfortable, affordable to heat, and code-compliant for decades.
Why Cold-Climate Insulation Is Different
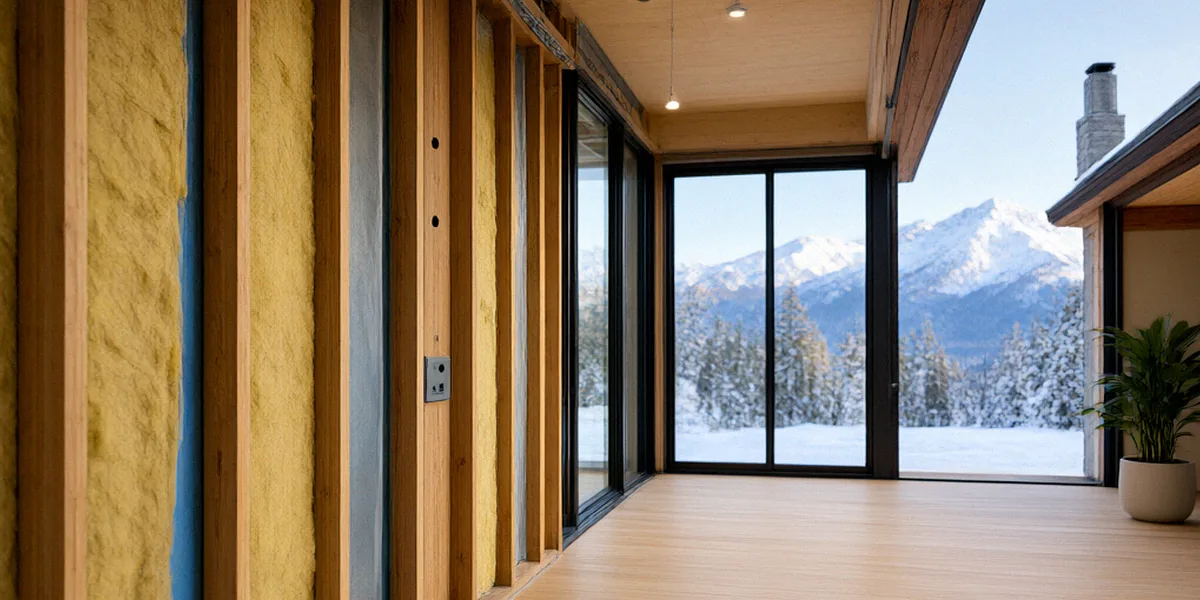
Insulation that performs fine in Vancouver or Windsor can fail badly in Sudbury or Saskatoon. Canadian winters combine three punishing forces: extreme temperature differentials, frost heave, and moisture migration. Natural Resources Canada (NRCan) and the National Building Code of Canada (NBC) both treat our climate zones as a distinct design problem, and for good reason. The NBC sets minimum R-values for cold climates that far exceed what you’d see in milder jurisdictions, and those minimums are just the floor, not the target.
The Science of Heat Loss in Canadian Winters
Heat always moves from warm to cold, and in a Canadian winter the gap between your living room and the outside air can exceed 50°C. That drives three types of heat loss simultaneously: conduction through solid materials, convection through air leaks, and radiation. Conduction is what R-value measures, but air leakage can account for 30 to 40 percent of total heat loss in a poorly sealed home. Frost heave matters too, because it stresses foundations and can open gaps where insulation meets the slab or rim joist. Every material choice you make has to account for all three mechanisms, not just the R-value printed on the bag.
Moisture, Condensation, and Vapour Barriers
In a heated Canadian home, warm moist air wants to migrate outward through the wall assembly. If it hits a cold surface, it condenses, and repeated condensation leads to mould, rot, and ruined insulation. That’s why vapour barriers and air barriers are non-negotiable in our climate. The general rule is that the vapour barrier goes on the warm side of the insulation, but with exterior rigid foam, the rules shift and you may need a smart vapour retarder like CertainTeed MemBrain or Siga Majrex. Get this wrong and you’ll be tearing open walls in five years.
Top Insulation Materials for Canadian Self-Builds
We’ve installed or evaluated four main categories on our own builds and on friends’ projects: mineral wool, fibreglass, cellulose, and spray foam. Each has a place, and most well-built Canadian homes use more than one.
Mineral Wool and Fibreglass Batts
Rockwool mineral wool is our default for exterior walls. It’s denser than fibreglass, repels water, is fire-resistant, and crucially, it maintains its R-value in extreme cold better than fibreglass. Fibreglass batts from Owens Corning or Johns Manville are cheaper and easier to cut, but they lose effective R-value when temperatures drop below minus 20°C because of convective looping inside the batt. If budget forces fibreglass, use it in interior partitions and ceilings, and put mineral wool where the cold really bites.
Cellulose and Spray Foam Options
Blown cellulose is the best value per R-value for attics and dense-packed wall cavities. It’s made from recycled paper, handles moisture reasonably well when treated with borates, and settles into irregular spaces. Spray foam, whether closed-cell like Icynene or BASF Walltite, or open-cell like Demilec, gives you the highest R-value per inch and doubles as an air barrier. Closed-cell foam hits around R-6 per inch and is ideal for rim joists and crawl spaces. The downside is cost, typically two to three times batt insulation, and you need to hire a certified installer for most products.
Rigid Foam Boards for Exterior Sheathing
Exterior rigid foam, usually expanded polystyrene (EPS), extruded polystyrene (XPS) from Dow or Owens Corning, or polyisocyanurate, breaks the thermal bridge through your studs. A 2-inch layer of XPS adds about R-10 and keeps the sheathing warm enough to prevent condensation inside the wall. This is one of the highest-return upgrades we’ve made on every build. It also protects your framing from frost-driven moisture.
Meeting Canadian Building Codes and Permits
Getting permits right is where a lot of owner-builders stumble. The rules vary by province, and in some cases by municipality, so you can’t assume what worked for your cousin in Alberta will pass in Nova Scotia.
Provincial Energy Codes and R-Value Minimums
The National Building Code of Canada sets minimum R-values for cold climates, but provinces adopt and modify it. Ontario’s SB-12 (Supplementary Standard SB-12) prescribes minimum R-values and performance targets for new homes, and BC’s Energy Step Code pushes builders toward net-zero-ready assemblies in steps. Quebec has its own Chapter I of the Construction Code. NRCan recommends R-50 for ceilings in Canadian climate zones, R-22 to R-24 for above-grade walls, and R-20 or better for basement walls. Those are sensible targets, not just code minimums.
Permit Applications and Inspections for Insulation
When you apply for a building permit, you’ll typically submit drawings showing your wall, roof, and foundation assemblies with R-values and vapour barrier locations. Inspectors will check insulation at the rough-in stage before drywall goes up, and some municipalities require a separate energy compliance report. Keep your material receipts and manufacturer spec sheets on site. In our experience, an inspector who sees a well-labelled, code-referenced assembly signs off quickly. One who finds mismatched R-values or missing air sealing will send you back.
Installation Tips for Owner-Builders
Even the best insulation underperforms if it’s installed sloppily. We’ve learned these lessons on our own builds so you don’t have to repeat them.
Air Sealing and Vapour Barrier Best Practices
Air sealing is the cheapest energy upgrade you can make. Use high-quality tapes like 3M All Weather Flashing Tape or Siga Wigluv on sheathing seams, and Siga Rissan or similar for interior vapour barrier joints. Seal every penetration: electrical boxes, plumbing stacks, and top plates. A blower door test before drywall will show you exactly where you missed. Aim for under 1.5 air changes per hour at 50 pascals (ACH50), which is the rough target for an energy-efficient Canadian home.
Insulating Around Window Frames and Doors
Window frames are the weakest thermal link in any wall. Even triple-glazed units lose heat through the frame itself, and the rough opening is where air leaks love to hide. Back the gap with low-expansion spray foam, not the standard stuff that bows frames, then seal with acoustic caulking on the interior and a proper flashing tape on the exterior. Consider offsetting window frames inward so exterior rigid foam can wrap the rough opening. This one detail made a measurable difference in our heating bills.
Cost vs. Performance: Making the Right Choice
Insulation is one of the few building components where spending more upfront pays you back every month for the life of the home. But we still have to be realistic about budget.
Budgeting for Insulation in Your Self-Build
For a typical 2,000-square-foot Canadian home, expect to spend roughly:
- $3,000 to $5,000 for fibreglass batts in walls and ceilings
- $5,000 to $8,000 for mineral wool in walls plus blown cellulose in the attic
- $10,000 to $18,000 for a spray foam and rigid board hybrid assembly
- $1,500 to $3,000 for air sealing tapes, membranes, and caulking
Home Depot Canada and Rona both stock the common materials, and specialty suppliers like Rockwool distributors or spray foam contractors can often match or beat retail on volume. Don’t cheap out on tapes and membranes; that’s where the real performance lives.
Rebates and Incentives for Energy-Efficient Homes
The Canada Greener Homes Grant offers up to $5,000 for insulation upgrades, and it covers walls, attics, basements, and air sealing. You’ll need a pre-retrofit EnerGuide evaluation from an NRCan-licensed advisor, then a post-retrofit evaluation to claim. Provincial programs like Efficiency Nova Scotia, Enbridge’s Home Efficiency Rebate in Ontario, and CleanBC in British Columbia stack on top in some cases. If you’re building new, some utilities offer incentives for hitting higher tiers of the BC Energy Step Code or equivalent provincial standards.
FAQ
What R-value do I need for a Canadian self-build?
NRCan recommends R-50 for ceilings, R-22 to R-24 for above-grade walls, and R-20 or better for basements in most Canadian climate zones. Your provincial code may require slightly different minimums, so check with your local building department before finalizing your assemblies.
Is mineral wool worth the extra cost over fibreglass?
In our experience, yes, especially for exterior walls. Rockwool maintains its R-value in extreme cold better than fibreglass, resists moisture, and adds fire resistance. The price premium is usually 20 to 40 percent, which pays back over the life of the home.
Can I install spray foam myself?
Two-component spray foam kits are available at Home Depot Canada and similar retailers, but most closed-cell products require a certified installer for warranty and code compliance. Small touch-ups with a froth kit are fine for DIY, but full wall cavities should be left to a pro.
Do I need a vapour barrier if I use spray foam?
Closed-cell spray foam acts as both insulation and vapour barrier at thicknesses above 2 inches. Open-cell foam does not, and you’ll still need a separate vapour retarder. Always confirm with your local inspector, since requirements vary by province.
How much can the Canada Greener Homes Grant cover?
The grant offers up to $5,000 total for insulation upgrades, including walls, attics, basements, and air sealing. You must complete a pre-retrofit and post-retrofit EnerGuide evaluation to qualify, and the work has to be done by a licensed contractor in most cases.
Insulation isn’t glamorous, and it’s easy to treat as a place to save a few thousand dollars. But in a Canadian climate, it’s the single most important investment you’ll make in comfort, code compliance, and long-term energy costs. Choose materials that perform in the cold, seal every gap like your heating bill depends on it, because it does, and take advantage of the rebates that are there to help. Build it right the first time, and you’ll spend the next thirty winters glad you did.